Related sites:
Newsletter: Perspectives on Power Platform
Company: Niiranen Advisory Oy
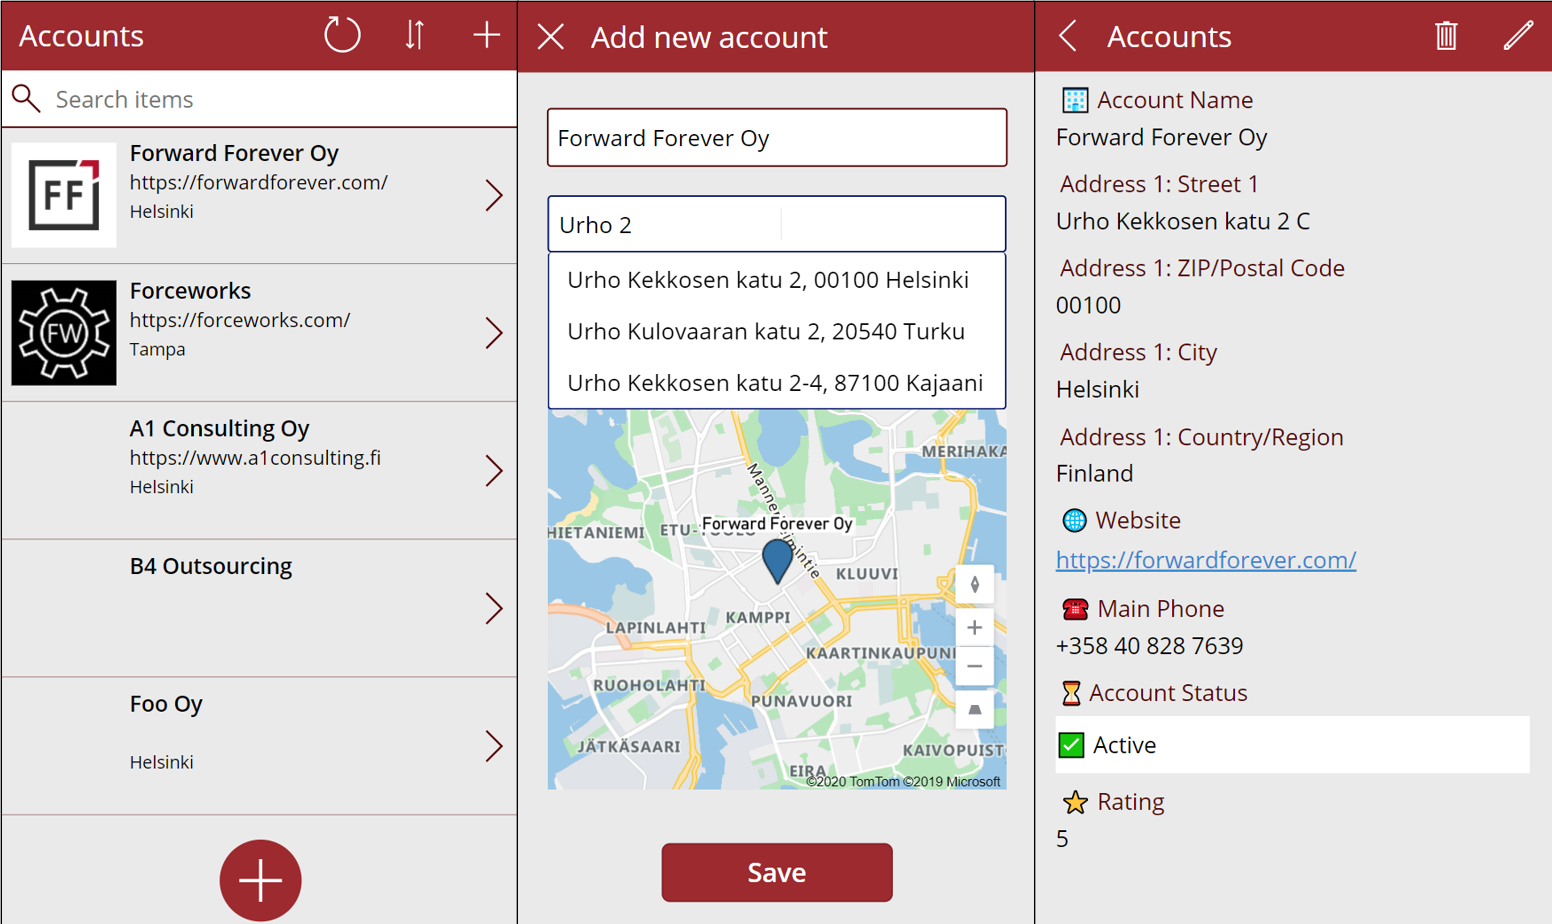
Using the new geospatial controls in Canvas apps to combine Azure Maps features with customer address data from Dataverse.
In the Power Apps team blog there was an announcement of the GA availability of Geospatial Features for Canvas apps. In short, we now have a preview of two new controls powered by Azure Maps:
I decided to do a quick test of how to leverage these new capabilities in a simple scenario where we are managing account address information via a Canvas app running on a phone screen. Here is the end result:

Simple yet effective! Let’s explore the steps I needed to perform to achieve this functionality.
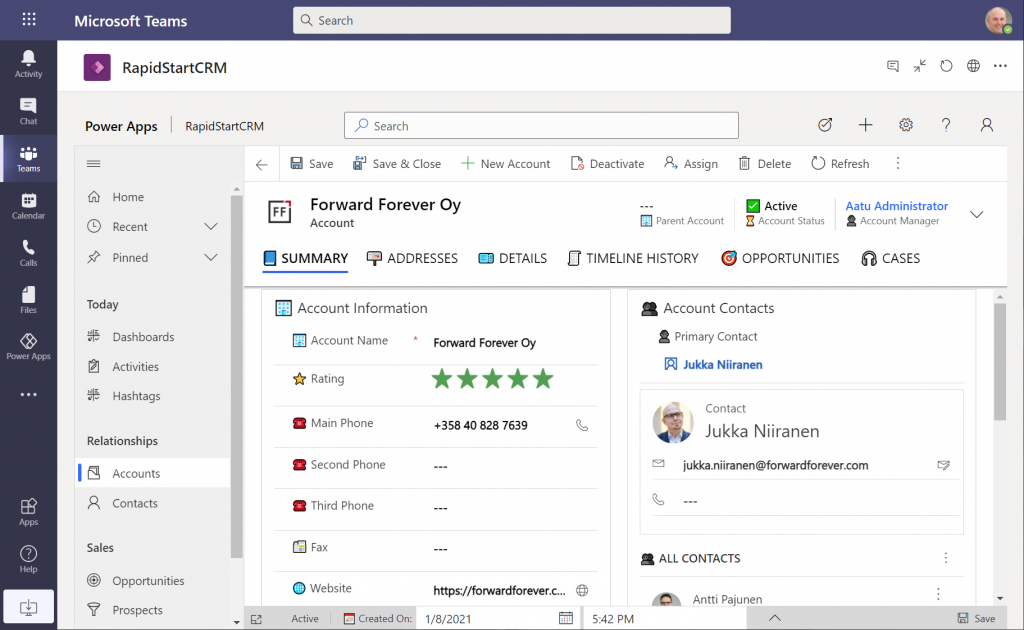
As a starting point, I’m using a pure Dataverse environment with no Dynamics 365 components. Instead, I’ve installed the free RapidStartCRM solution to give me a simplified CRM data model, plus a fully working Model-driven Power App. I could embed this inside Microsoft Teams and use it via a channel tab, for example:
In our scenario I want to offer the users a simplified UI to be used on a phone screen, with only a small subset of the full features found in the Model-driven app. I’ll focus just on the account data, which means I can simply start by going to make.powerapps.com and choose to generate the mobile app based on a data source. In this case I’ll select the account table in the Dataverse environment where RapidStartCRM is deployed. This gives me the basic 3-screen UI for browsing, viewing and editing records (yeah, I know, “rows” – but I refuse to adopt this part of the latest MS BizApps naming bingo results just yet).
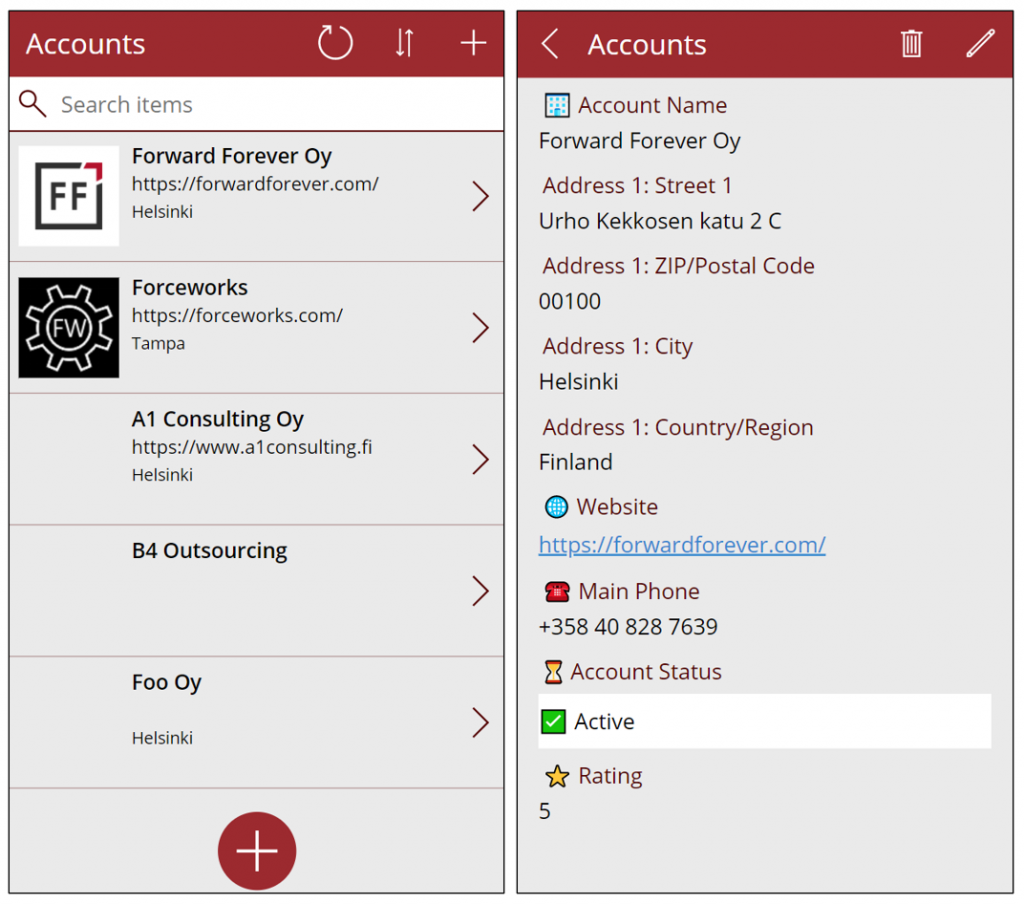
I want to create a custom data entry UX for this demo scenario, so I’ve added a “+” button at the bottom of the gallery screen to launch a new screen where I’ll be leveraging the geospatial features.
It’s never a fun task to enter the address details when creating new account records, especially when on a mobile device. Instead of asking the user to fill the various fields included in an address, we’ll add the new Address input control from the Input menu onto our “Add new account” screen. From the control’s documentation page we can see there are a number of input properties we could use, but it works quite well just by dropping it as a field onto the form and starting to enter text:
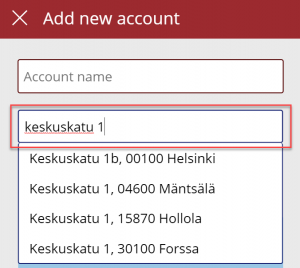
In my case, I did limit the country set to “FI” to give me just Finnish streets for my demo app. It looks like you need to enter the street name and number before anything is suggested by the Azure Maps API, but you’re allowed to have small typos in the street name, so there’s some fuzzy matching logic applied here.
The real benefit of the Address input control is in the 19 output properties you get from it. Ultimately I’ll want to use them to A) show the map control based on lat/lon and B) store the data onto the new account record the app will create. But first, it’s nice to see the control’s output on the screen while updating values, so I’ve added a few labels where I display the results from the selected address. To do this, I’ll reference properties like AddressInput1.PostalCode and AddressInput1.Municipality to construct a nice looking string for the text property of the label:
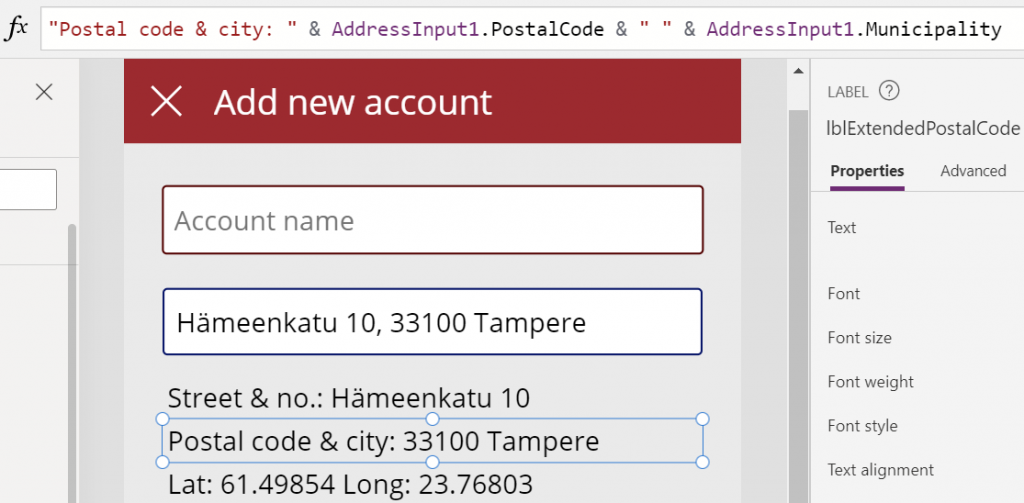
This exercise will also help me in identifying how I’ll need to concatenate properties like StreetName and StreetNumber to create a valid value for the Dataverse account table’s Street 1 field eventually.
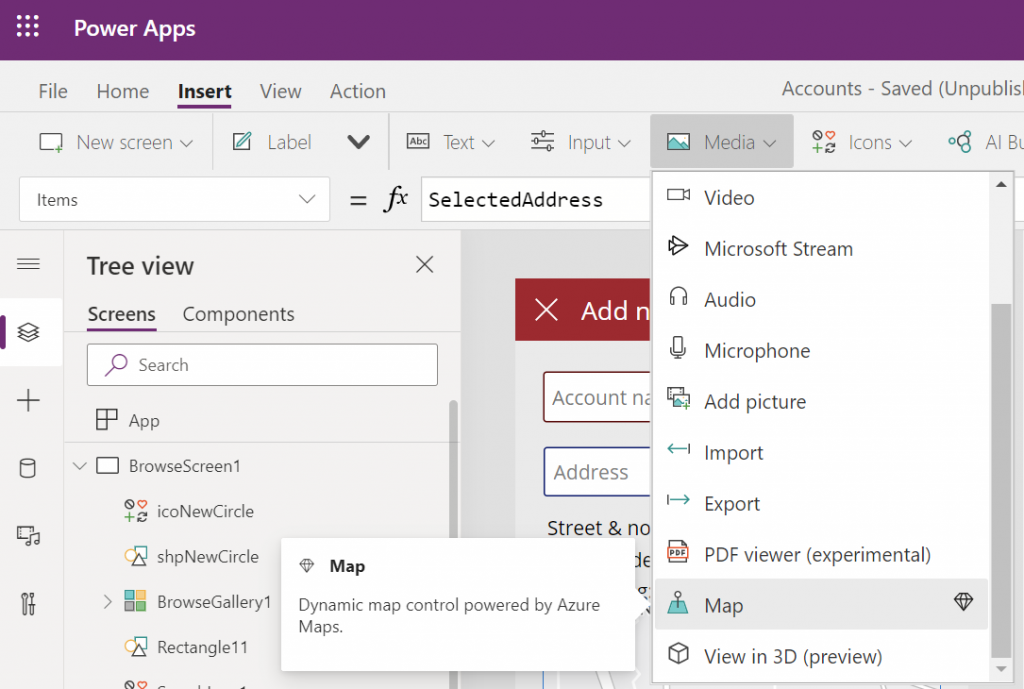
Seeing a map view where the address we’ve inputted is physically located is a big factor in the app’s user experience. We’ll want to give visual confirmation to the user that the address is actually at a location where they expected it to be, plus the ability to zoom in/out on the map to explore the surroundings. So, while in the Power Apps maker studio, let’s click on the Media dropdown and add the Map control onto our screen.
Hmm, how do we then tell the Map control to zoom in to the address we’ve selected in the Address input control? I had to browse the Interactive map component documentation for quite a while to figure out a way to do this, as it wasn’t entirely obvious how to visualize an individual address rather than a table of records. What I ended up doing was to go into the OnChange property of the Address input control and create a SelectedAddress variable to be set to the chosen address whenever the field’s value changes:
Set(SelectedAddress, Table({Label:tiAccountName.Text, Longitude:AddressInput1.SelectedLongitude, Latitude:AddressInput1.SelectedLatitude}))Note that in my app I’ve got a Text input control tiAccountName into which the user is requested to type in the name of the new account being created, before proceeding to work with the Address input control. I’m picking that name as the label to be shown on the map pin.
Then in the properties of the Map control I’m setting the values of ItemsLabels, ItemsLatitudes and ItemsLongitudes properties to reference my SelectedAddress variable’s respective properties:
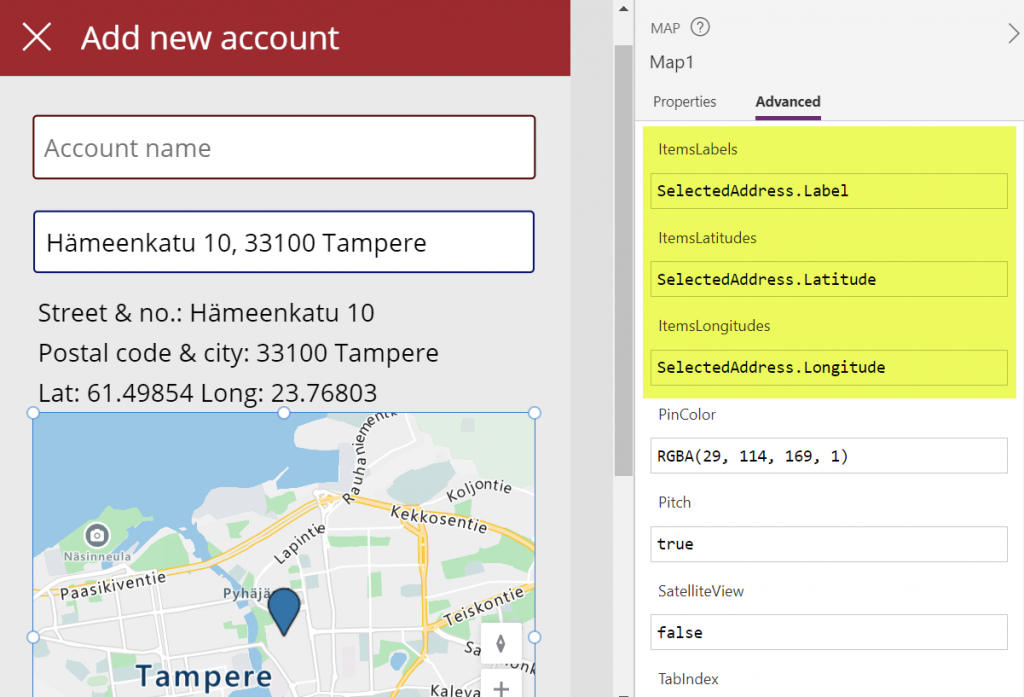
There’s a variety of other input properties for the Map control, many of which I didn’t yet tweak in my demo app. For example, setting the default location to be that of the current location of the user’s device might be a good idea, but a quick test in the browser didn’t yet tell me how exactly I’d then replace that with my custom location from the variable. I’m sure the will be plenty of ways to optimize these map parameters when connecting them with your app’s business logic and data.
Finally we need to store the account name and address details onto a new Dataverse record in the account table. As we aren’t working with the form control here, it’s time to use the Patch function. I always need to check the Docs page for the exact syntax, but when working with simple text fields in the target table, the formula isn’t all that complex. On my Save button of the “Add new account” screen I’m running this:
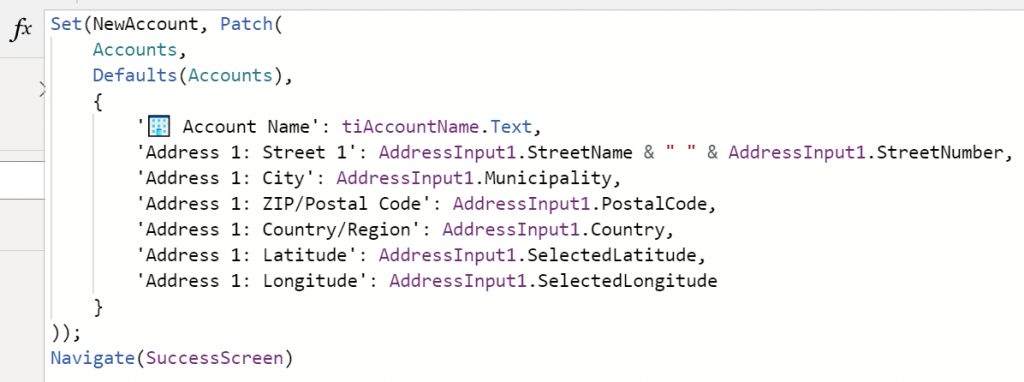
I’m storing the results of the Patch function also inside a NewAccount variable, so that I could reference the values further in the UI if needed (confirmation dialogs, for example). No error handling or anything else fancy here in the demo app, instead I’m just navigating the user to a “Success!” screen after the record has (hopefully) been saved in Dataverse:
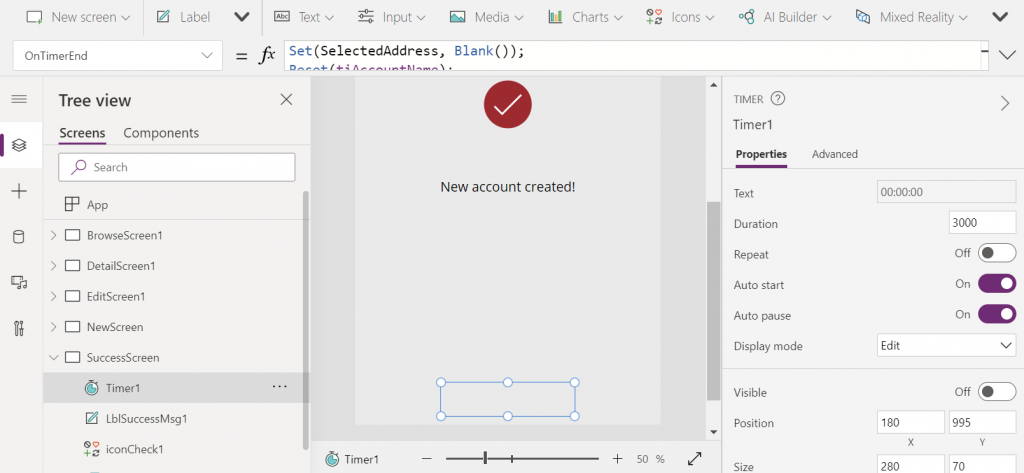
The “Success!” screen has an invisible timer control set to auto start and a duration of 3000 milliseconds. In the OnTimerEnd I’m doing housekeeping like setting the SelectedAddress variable to Blank(), resetting the Account name text input, then navigating the user onto the account browse screen that will show our newly created account somewhere in the gallery. Another option would of course be to take the user onto the full Edit Screen of the record, to enter further details via the standard form control if needed:
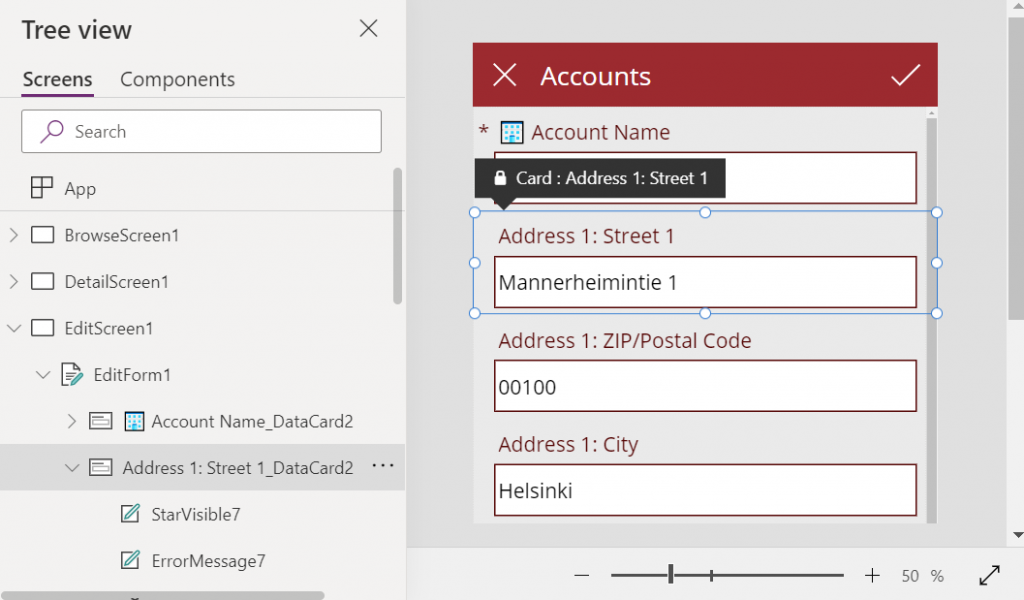
That’s all there is to it! All in all, my first impression from these new geospatial features is quite a positive one. It’s important to note that since they are using Azure Maps service behind the scenes, these controls have the “premium diamond” next to them in the UI. This means you’ll need to have a premium license like Power Apps Per App or Power Apps Per User for users who are taking advantage of these address mapping features. Also keep in mind that the Power Platform environment where your app lives in must be enabled for geospatial features by the admin.
Hi nice article.
I tried what you did but it wasn’t working only to find out that you need to fill in the ‘Items’ under Advanced properties field and set it your variable ‘SelectedAddress’.
Took me a while to figure it out but it got it to work in the end.