Related sites:
Newsletter: Perspectives on Power Platform
Company: Niiranen Advisory Oy

After having managed to overcome my previous challenges of deploying SQL Server 2012 Reporting Services on a virtual machine running in Windows Azure, I was well underway in configuring my Dynamics CRM environment to contain the tools and data needed for developing, testing and even demonstrating custom solutions right in the Microsoft cloud.
I had started off with a medium size virtual machine that had 2 CPU cores and 3.5 GB memory. While I’ve been able to successfully use CRM 2011 + SQL 2012 on such a setup as a personal development box, I have to say it’s not exactly the fastest thing around. With me being the only person working with the environment currently, it wouldn’t have been such a big issue, but upon trying to import one 5 MB solution file into a CRM organization I started running into timeout issues, leading to the following message:

It’s not very uncommon to experience timeouts with CRM when working with large solution files. There are various settings that you can modify to overcome this issue, including the OLEDBTimeout, Web.Config parameters etc. However, I wasn’t having success with the solution import regardless of having applied the registry and settings changes, so I thought why not crank it up a bit and give my virtual machine some more resources. After all, isn’t that one of the selling points of on-demand cloud computing? If you need more power, just adjust the lever and consume the resources as you see fit.
I proceeded with shutting down my virtual machine from Windows and going to the Azure management portal. After finally getting the portal to confirm that the machine was in a stopped state, I changed the virtual machine size from medium to large (4 cores, 7 GB). Great, now let’s fire it up once again by clicking on Restart and… it doesn’t start. Trying it again and still the only result I get is the following notification in hte Azure portal:
The virtual machine cannot restart. The current virtual machine state is RoleStateUnknown.
Ok, I’ll wait a while, I thought to myself. After a few minutes and some more clicks on the Restart button I was starting to get a bit anxious on why my server wasn’t booting up. I started googling for the error message and discovered a discussion thread that indicated I wasn’t the only person in the world suffering from this problem. The RoleStateUnknown message appears to be a known issue that the Windows Azure team will be fixing by the time the Preview phase is over, but for the time being, this is something you can expect to happen if you power off a virtual machine in Azure on a bad day. If the error message does not go away, the only workaround you have is to create a new copy of your virtual machine.
While there are ways to do the process through PowerShell to export & import the virtual machine, I decided to take the GUI route and just click on the Delete button on my virtual machine. I must admit that particular action doesn’t feel quite right, deleting the very server you’re trying to get back up, but in this context it’s actually not as catastrophic or irreversible as it sounds at first. You see, the server really is just a VHD disk that has been assigned the hardware, IP and other pieces that make it operational. It’s also worth noting that this is the way how you can stop incurring costs from your virtual machine. If you just shut down your VM, you will still be charged for it, but if you delete the server, you’ll have an image available that you can later on use for creating a new server.

After deleting the server, I created a new one with the same configuration. OK, not exactly the same, as both the [servername].cloudapp.net DNS entry and the IP address will change in the process. Also do note that the remote desktop port will be different, so only updating the server name in your RDP settings won’t allow you to connect, as I quickly discovered after clicking on Restart.
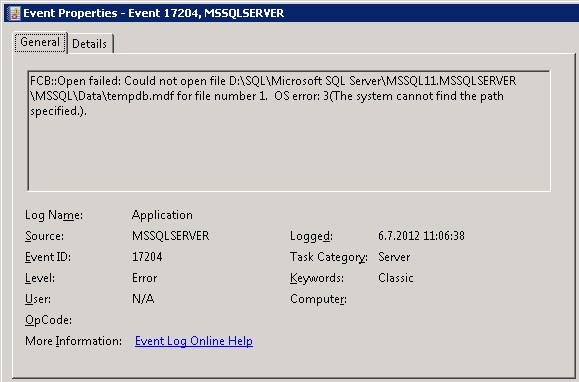
Oh yeah, I had that extra F-drive on my machine, too! Better remember to attach that disk as well, since that’s where my CRM databases are located. I hit a restart on the SQL Server service, but noticed that the databases still weren’t available. Then I remembered what Shan McArthur had accidentally demonstrated in his Windows Azure 2012 Spring Wave webinar session on XRMvirtual earlier this week. Although the D-drive on an Azure virtual machine is great for storing temporary data that doesn’t need to be consuming that precious C-drive, the fact that the D-drive is only a temporary storage means also that any directory which you create on that disk will not be available once you spin up a new virtual machine from the same VHD. A quick peek into the Windows application log confirmed that this was what was keeping my SQL Server from starting up, as it wasn’t able to locate or create Temp DB and log it needed.

“FCB::Open failed: Could not open file D:\SQL\Microsoft SQL Server\MSSQL11.MSSQLSERVER\MSSQL\Data\tempdb.mdf for file number 1. OS error: 3(The system cannot find the path specified.).” There we go, that was the path that was missing from my D-drive. In a default configuration the temporary database would have been under C:\Program Files, but I had put it on D:\SQL instead, so I needed to manually go and create the folder. After this my virtual machine was again able to run CRM the way that is was meant to be. I’m sure there’s a PowerShell script sample out there somewhere for those who wish to automate the directory existence verification and creation upon restart of their servers, but this shouldn’t be a too frequent problem unless you go deleting your Azure virtual machines on a regular basis, so I didn’t bother looking up one right now. The main thing for me was I had my CRM test server running now on double the capacity.
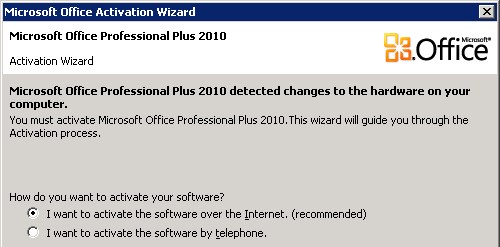
As a side note, once I opened up Excel, I was greeted by this Microsoft Office Activation Wizard. I guess that proves that it’s now really a whole different machine I’m working on, even though I booted up from the same VHD that I had already activated on the previous day. Hardware based license management feels a bit funny when operating in such an intangible environment as Azure, but that’s how it is…

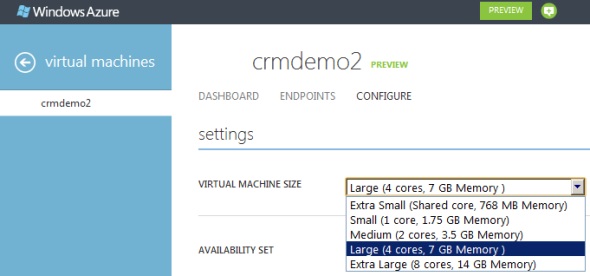
Finally, let’s get back to the topic mentioned in the title of this blog post: What is the right way to change the size of your Windows Azure virtual machine? It turns out that you can actually do this right from the Azure management portal without shutting down your server. That’s what it says on the Azure community pages:
NOTE: If you are attempting to just change the size of your Virtual Machine, you can do this without stopping the Virtual Machine. You can go into the “Configure” tab on the virtual machine in the management portal and select the Virtual Machine size. This will change the size without first stopping, which will allow you to avoid this issue in this scenario.

Will be interesting to see how the Windows server will cope with disappearing CPU cores and memory if I decide to go back from Large to Medium, but I’ll leave that experiment to the next time. Now let’s see if I could get that solution file imported first…
[…] not a very difficult process if you follow the instructions (and know the few gotchas about SQL or VM size settings). Also, if you don’t need to keep the server up & running on a continuous basis, you can […]