Related sites:
Newsletter: Perspectives on Power Platform
Company: Niiranen Advisory Oy
In my previous post about the new functionality included in CRM 2013 SP1 / Spring ’14 release I laid out the big picture of how case creation and routing rules relate to cases and queues in Dynamics CRM. Now it’s time to take a more detailed look at how you would actually configure these rules to automate your case creation process. There are a few limitations that it’s good to be aware of before you jump into applying these new tools in your service management scenarios.
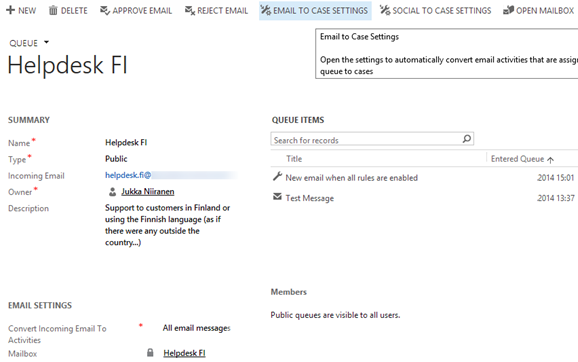
As illustrated in the big picture of queue and case management in my previous article, Case Creation Rules are specific to a single queue. Also, you can only have one Case Creation Rule per queue – per channel. It is nevertheless a 1:N relationship between queues and rules, since a queue can have a Case Creation Rule both for email and social activities (the latter of which are not yet leveraged in this release). The Command Bar buttons on the updated queue form, labelled “Email To Case Settings” and “Social To Case Settings”, take you to the respective rule record.
The Case Creation Rule form allows you to configure predefined conditions for case creation. Emails from unknown senders can be filtered away from case creation. Also the existence of a valid entitlement for the sender (contact) or the senders company (parent account) can be used as a filter. Finally, email related to an already resolved case can be set to generate a new case record, with a configurable “quarantine” time period. So, if you resolve a case today and the customer replies “thanks for your help”, this probably shouldn’t generate a new case, but a reply sent after 3 days to the same email thread might warrant opening up a whole new case record.
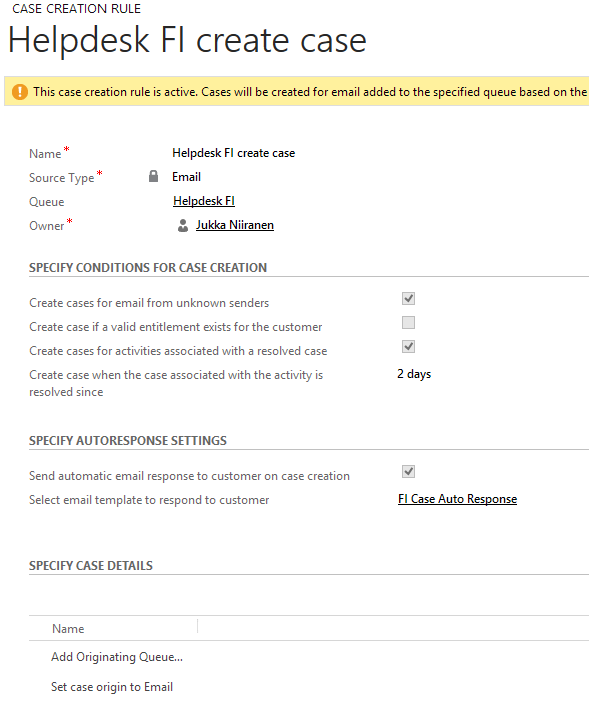
That’s all the conditions you can apply for the automatic case creation. There’s an additional entity called Case Creation Rule Item that’s found in the “Specify Case Details” subgrid. What this feature allows you to do is specify a condition on the activity record (email or social activity) and set values for the newly created case’s fields. As an example, if the email subject contains word X, you could populate the case subject lookup field with value Y. So, you can’t use these Rule Items to determine whether a case will be created or not, but you can pass along some variables from the originating activity.
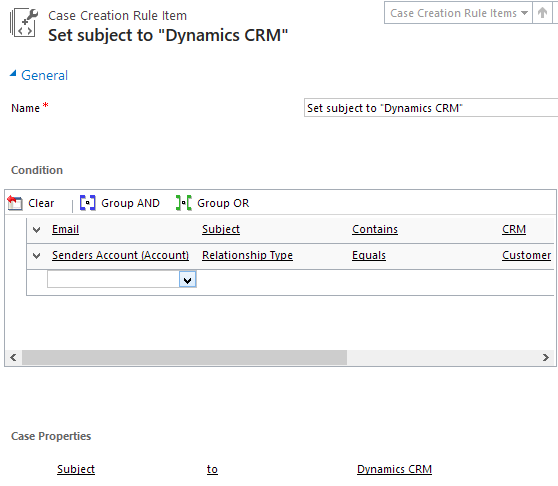
The entity fields you can access in the Conditions box are limited to those directly related to the email (or social) activity. There is however one welcome exception and that is the Senders Account. This means that when the email is coming from a known contact, there’s a way to reach into the fields of the account related to the contact (related to the activity), to check variables like relationship status, customer category or other important pieces of information in a B2B service scenario.
One limitation to be aware of is that you can’t insert dynamic field values in the Case Properties section like you could in the standard workflow editor.
Once you have a case record created in the system, you can apply some Routing Rules on it. The Routing Rule Set is simply an umbrella for the actual Rule Items that you create under it.
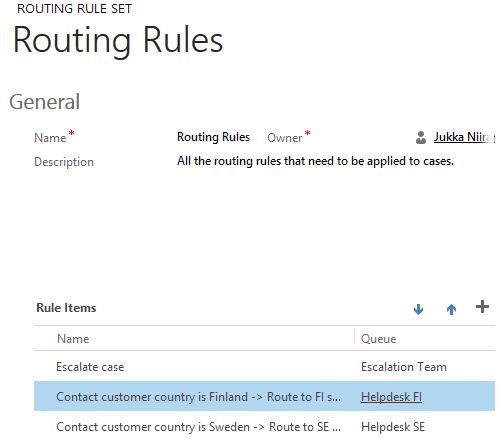
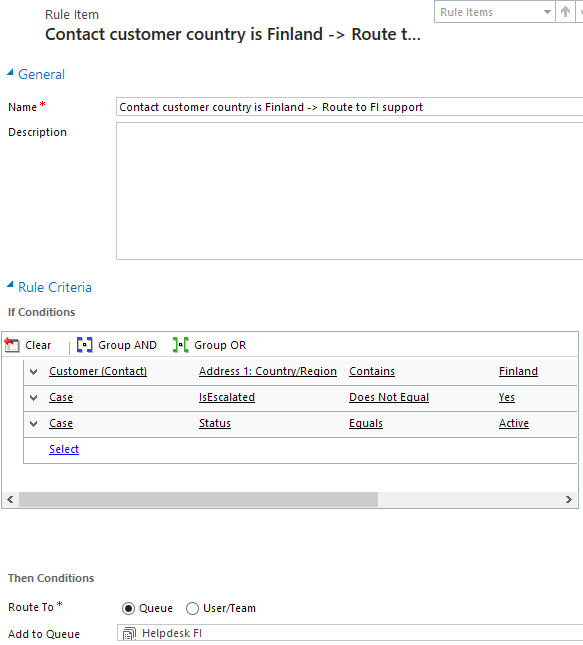
The Routing Rule Item resembles the Case Creation Rule Item entity quite a bit. We have a Conditions section where we can define a set of “If” conditions that determine whether the “Then” actions will get performed or not. Since we’re dealing with the case entity as the object here and not the email activity anymore, our criteria for the Routing Rule Item can be selected from any entity with a parental relationship to the case. In the actions section the only option is to route the case to a queue or user – no other updates to the record can be performed by the Routing Rule.
If we now want to go and build another Routing Rule Set, CRM will happily let you create the record, add new Routing Rule Items under it and so on. Only once you go and attempt to activate it (like you must do for all the new Service Management configuration entities prior to them taking effect), you’ll be presented with the following warning dialog:
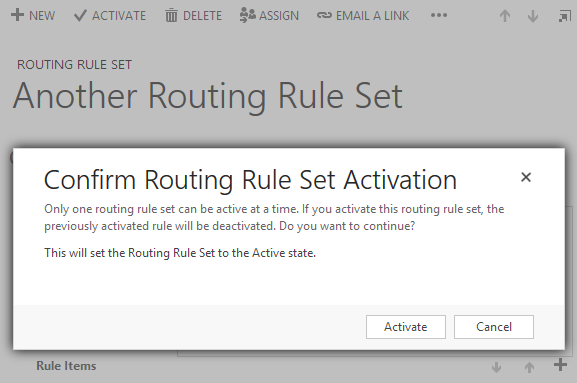
There can be only a single Routing Rule Set active at any given time, which means its rules are applied to all cases created via a Case Creation Rule. The only rational reason for having a second Routing Rule Set is when you plan to replace the currently active set with a brand new one (if you wish to avoid the service break caused by de-activation).
Now, one thing to note is that the Routing Rule Items are evaluated in the order in which they are listed on the Routing Rule Set form’s subgrid. You have the arrows there to change the order, so you’re not stuck with the latest Rule Item always being the last one. Whichever rule first has a matching criteria will win, so be sure to set the conditions to be sufficiently specific so that nothing slips into the wrong queue by accident. Keep in mind that the user also has a button on the case form to manually apply the routing rules, which will go through every single Routing Rule Item in the active Routing Rule Set until it finds a rule where the conditions are met (or then nothing is found and no action is taken).

Here’s one “gotcha” that I discovered while testing the new functionality. If you use a Case Creation Rule to convert email messages coming into a queue, the resulting case will not be put into the original queue by default. In fact, it will not be in any queue unless you specify at least one Routing Rule in a Rule Set that puts it into that queue. So, if you want new cases to always be in a queue and you wish to leverage the Case Creation Rules, you’ll also need to have Routing Rules, even though you don’t really want to route items between different queues.
Note that because the Routing Rule will not have access to the original email activity but rather only the resulting case record and its parental records, by default it can’t see from which queue the case originated from. To overcome this limitation you can leverage the Case Creation Rules’ capability to set values for specific fields of the case record that is being created via the rule. For example, you could add an option set field onto the case called “Originating Queue” and then populate the value of this field via the Case Creation Rule associated with the queue. This allows you to pass variables from the original email onto to resulting case, which can then be referenced in the Routing Rules.
[…] CRM 2013 SP1: Case Creation and Routing – The Details […]
[…] CRM 2013 SP1: Case Creation and Routing […]