Related sites:
Newsletter: Perspectives on Power Platform
Company: Niiranen Advisory Oy
Dynamics CRM 2013 was released only a bit over year ago, on October 8th 2013 to be exact. With CRM 2015 already knocking at the door, this seems like ages ago already, even though the actual time between these two major releases is shorter than their marketing names imply.
Since the discussions in the Dynamics CRM community will inevitably be moving towards the latest 2015 version as the year turns, it’s a good moment to reflect back a bit and recap what the previous release gave us. I took a look at some of the blog posts I’ve personally written regarding CRM 2013 specific functionality since the version came out. By analyzing the page view stats from my blog, the following articles came out on top as the five hottest topics that you, the readers, were interested in reading about. If you missed any of the articles, now’s the time to do a quick catch up before CRM 2015 steals all the attention.
 CRM 2013 introduced a new feature called server-side synchronization, which allowed the CRM server to communicate directly with the Exchange server for the first time in the product’s history. Upon first look it might have appeared like the long dependency on Dynamics CRM Outlook client was about to be history. However, in our brave new “cloud first, mobile first” world there are many more aspects to managing activity data in relation to CRM records that you need to understand.
While the synchronization options for activities and contacts were indeed expanded with CRM 2013, the tracking options were not. In addition, the combinations supported email client and server applications for each entity and action type were quite a maze to navigate in. Since this is not such an easy topic to grasp nor explain, I ended up building a support matrix of my own, so that I was able to clearly communicate the various synchronization and tracking options to our customers.
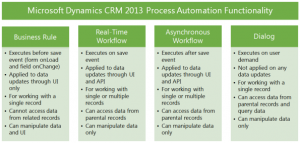
 Changes in the application’s UI may have grabbed most of the attention when it came to the CRM 2013 release, but there were also notable enhancements made to platform capabilities behind the scenes. Business Rules and Real-time Workflows opened up a whole new world of possibilities for the system customizers to create custom business logic that had previously required JavaScript or plug-in development.
The one process type that was highly visible to the users, Business Process Flow (BPF), was also perhaps the most demanding one when it came to applying it in real world scenarios. Since BPF’s themselves don’t provide any automation but rather rely on the other process types to work in conjunction with the BPF process stages and steps, understanding the role of each of these components will require a fair bit of experimentation. This is why I wrote a two-part article where I tried to lay out the big picture of process automation in CRM 2013.
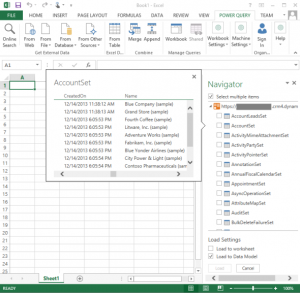
 While the CRM 2013 release itself didn’t provide any dedicated feature for the Power BI tools announced by Microsoft a bit earlier, there were updates made to the Power Query component in Excel 2013 that made it very interesting for CRM Online customers. More specifically, the December 2013 version of Power Query finally delivered the ability to connect to OData feeds what utilize Office 365 authentication – with CRM Online being such an application.
There isn’t a whole lot of official documentation available on the topic of how to leverage CRM Online OData feeds to build reports utilizing the Power BI toolkit. The process isn’t necessarily very straightforward and requires a fair bit of experimentation with the various Excel components (Power Query, Power Pivot, Power View). In addition to the OData feed connection part, I also wrote a couple other posts on what to do once you have the CRM data flowing into Excel via Power Query.
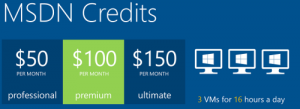
 Running Dynamics CRM in the cloud via CRM Online is a popular option these days, but for performing testing and development tasks it’s often more convenient to have your own sandbox where you can control each and every part of the system. Azure has evolved into quite an attractive option for running virtual machines, especially with MSDN subscription credits and discounts for development environments.
I’m not an infrastructure specialist that enjoys configuring servers very much, but when new versions of Dynamics CRM become available as preview/beta versions, it’s a good exercise to set up your own sandbox server. To better remember what the minimum steps are to be able to install the Dynamics CRM server application, I decided to document the process via screenshots and make it available on SlideShare for anyone else wanting to complete the same task.
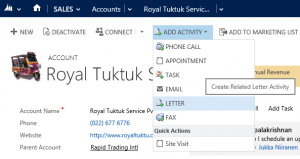
 In the course of the UI refresh performed in CRM 2013, the number of menu options visible to the end users were optimized to cover only a single way to perform many of the options that previously might have had alternative route options. While the intention was noble, this did create a few situations where the navigation path required to perform an action may have not been the optimal one.
The great thing about Dynamics CRM is that it’s a customizable platform that allows you to adjust the data model, forms and also the menu options to the specific use cases required by the customer organization – as long as you know how. With awesome community contributed tools like the Ribbon Workbench these tasks can be completed with a few clicks of a mouse, which is what I illustrated in this post where I added a new flyout menu onto the CRM 2013 Command Bar to access standard as well as custom activity records, and even launching a dialog process directly from the menu.